10-Minute App - IIS Setup for Windows Phone 7
The final 10-minute app, this time for Windows Phone 7! I will be using a trusted intermediary, so if you haven’t read that article yet, head on over here. You’ll also need the Windows Phone 7 SDK installed. As with the Windows Azure app, there were some hurdles in this setup, mainly all the setup around IIS. Therefor the article is split up in two, first is this setup article, next will be the actual code. If you missed the previous 10-minute articles, visit my blog for the Windows Presentation Foundation and the Windows Azure articles.
As I explained in the Trusted Intermediary article, mobile applications usually do not have access or support for active directory authentication. Which is exactly why we need an intermediary. For this article, we will need to create two visual studio projects: 1) A WCF service that consumes the actual AIF service using a trusted intermediary account, and exposes the AX AIF service out again with authentication of the consumer 2) A Windows Phone 7 (WP7) app that will consume our WCF service and display the results of the AIF service on the phone
The intermediary WCF service will need to authenticate the user. Unfortunately I’m still trying to figure out WCF authentication myself, and it would probably go beyond the “10 minutes” I’m aiming for anyway. A good start if you want to take this further would be MSDN. This blog article will give you all the basics, you just need to implement the authentication side properly. That being said, for basic authentication to work, Windows Phone 7 requires you to use SSL. It will effectively ignore any credentials you try to pass if you try to use a basic http site. This is a security decision and makes sense, you don’t want to be sending usernames and passwords in plain text around the internet. Unfortunately the Visual Studio built-in development web server (“Cassini”) does not support SSL. So we’ll have to change our Visual Studio solution to use IIS instead. No big deal, but a dent in my 10 minutes to go over this setup with you :-)
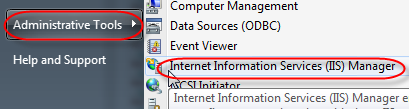
So first things first, which is setting up IIS. Our WCF service will run as whatever identity is used in the application pool for our website in IIS. Since our WCF service will call AX as a trusted intermediary, that means the application pool needs to run as the trusted intermediary user. Under administrative tools, open the Internet Information Services (IIS) Manager. Right-click on Application Pools and select “Add Application Pool”.
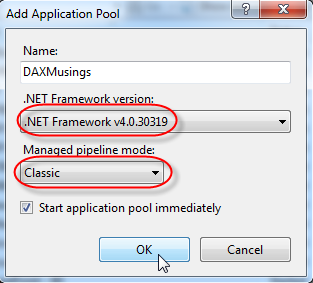
Name the application pool (I chose DAXMusings) and make sure to set the .NET Framework version to 4.0 and the pipeline mode to classic.
Next, right-click on your new application pool and select Advanced Settings.
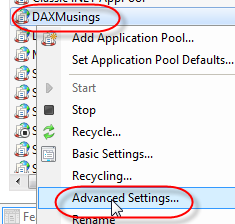
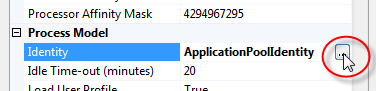
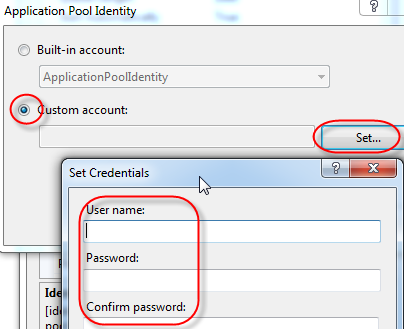
Under Process Model, click the ellipsis button on the Identity property. Select the “Custom account” and click the Set button. Set the username and password for your trusted intermediary in AX (make sure to prefix the username with the domain name and a backslash). Remember in a production environment things are different and security is top priority, and definitely don’t use your personal account for the application pool.
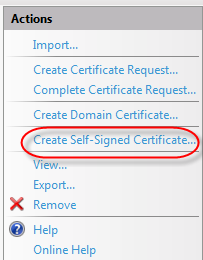
Click OK until you get back to the IIS Manager. Next we’ll need to create a certificate for our SSL site. Unless you want to shell out the big bucks for an actual certificate for your development server or laptop or whatever, we will just create a self-signed certificate. Click on the root level (the name of your server), and in the Features View, double click on the “Server Certificates” icon.

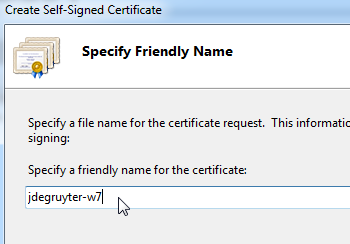
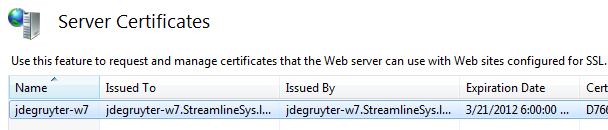
In the Server Certificate pane, click the “Create Self-Signed Certificate…” link in the right-hand side menu. In the dialog that pops up, enter a “friendly name” for your certificate. I just entered the name of my laptop (everything runs locally on my laptop). You should see the certificate show up with an expiration date. Note that under “Issued To”, IIS will have listed the FQDN (fully qualified domain name) of your server. You will need to use this later in the code, so make sure you know what the FULL name of your server is.
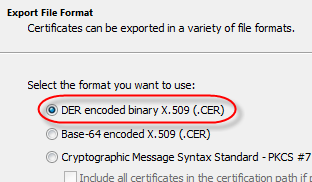
Double-click on your new certificate, or click the “View…” link on the right-hand side. On the certificate view dialog, click on the details tab. In the list, try to find the “Public key” row. When you click on it, the bottom part will show the key, and you can click the “Copy to file…” button.
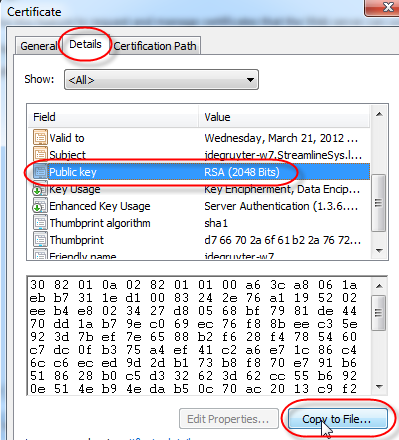
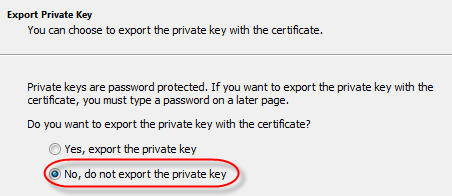
On the first wizard page, just click next. Select the default option to NOT export the private key. Click next. Select the default option “DER encoded binary”, click next. Select a location to save the .CER file, and click next. On the last page, just click the Finish button to save the file. This will save the public key to a file.
The reason we need this is a Windows Phone 7 “issue”. For security purposes, Windows Phone 7 apps can only accept certificates signed by a trusted authority. We will need to install the certificate on your windows phone device emulator for the phone to accept the certificate at all. Without it, you will get the very detailed and inspiring error message:
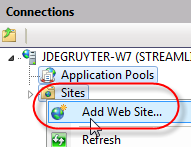
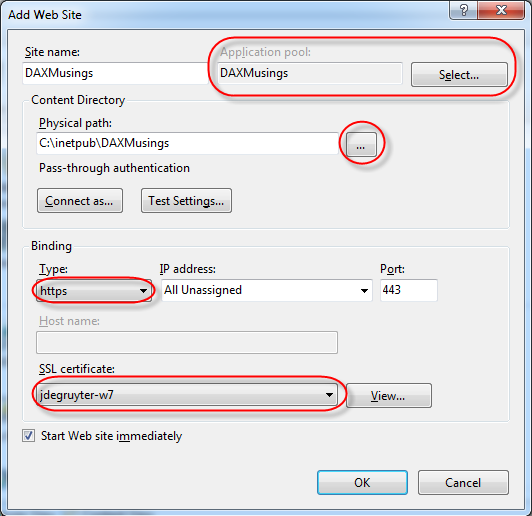
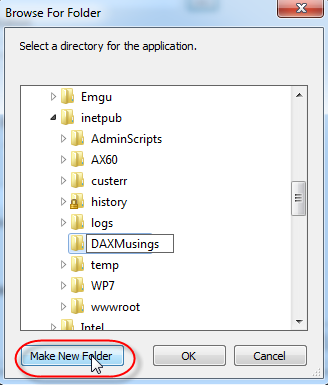
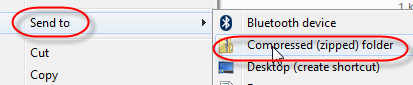
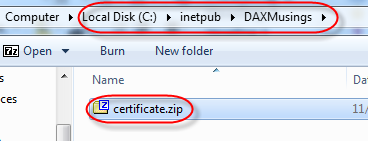
System.ServiceModel.EndpointNotFoundException : There was no endpoint listening atthat could accept the message. This is often caused by an incorrect address or SOAP action. See InnerException, if present, for more details.</i></blockquote>There is an open-source tool to install certificates on a WP7 device, but I found the easiest way to be providing the certificate file as a download on your website, so you can just download and install it on the WP7's internet explorer. As an FYI, I finally found what this error meant thanks to this blog post. Next in our IIS setup, right-click on Sites and select "Add Web Site". On the dialog, give the site a name (internal name so not an important choice), and under the "Select" button select the application pool we created previously. Under Physical Path, select the ellipsis lookup button and create a new folder. The default path for IIS sites is on C:\InetPub, so I just created a new folder "DAXMusings" underneath. If you already have a website on the default port (443), you will need to change the port. Just make sure you remember that port number, we'll need it in code later. Under "SSL Certificate", select the certificate (friendly name) we created in the previous step. Click OK. Finally in this setup, we need to put the CER file in a zip file to be able to install it on the WP7 device. Locate the .CER file we created from the server certificate, and right-click it, select "Send To", and select "Compressed (zipped) folder". If you have any other means of creating a zip file, feel free to use that instead. Move the new ZIP file (which I called "certificate.zip") to the new folder you created called "DAXMusings".I think we're finally ready to get coding!